Installing Windows 10 IoT on Raspberry Pi 3
Installing Windows 10 IoT on a Raspberry Pi 3 can be quite easy… if you take care of a few things up front. I’m wording this blog post from a total newbie’s perspective – someone who might know how to write software, but is taking their first dip into doing IoT in general and Raspberry Pi 3 in particular. If that fits your profile, keep reading.
The first thing you need is a device where you can install Windows 10 IoT on, such as the Raspberry Pi. Microsoft supports other boards as well, but I have gone with the Raspberry Pi (commonly shortened to Raspi) as it’s the most prominent of them. Next, I highly recommend getting the latest model the Raspi 3. Besides having upgraded specs, it now comes with on-board WiFi and Bluetooth. This easily frees up one to two USB ports for other peripherals.
Tip #1: As of post time (May 2016), Windows 10 IoT supports the on-board Broadcom WiFi chip but not the Bluetooth chip. You should get your own BT dongle if you envision the need to use Bluetooth now, although I’m sure Microsoft will support it fairly soon.
Tip #2: I found some posts in passing that slammed the choice of embedded WiFi chip on the Raspi 3 as it doesn’t support some advanced features. If you need capabilities such as promiscuous mode, you might benefit from an external WiFi dongle too.
That’s the hardware part more or less sorted.
Raspis use SD cards as the main storage by default. Directly installing Windows 10 IoT on a fresh SD card is possible, but I would highly recommend the use of NOOBS (New Out Of Box Software). It fits my needs as a newbie perfectly. Think of it as a NuGet Package Manager for Raspi OSes. It’s a lightweight bootloader that is able to connect to the Internet and download your choice of compatible OSes. Straight off the bat I was able to pick Raspbian (Linux distro with a complete desktop experience) and Windows 10 IoT. NOOBS has got a pretty clever partitioning method that allows multiple OSes on a single SD card.
Tip #3: To make things even easier for the n00bs among us, you can buy SD cards with NOOBS preloaded on them. I got mine from Pi Shop NZ. I plugged that into my Raspi 3 (which I bought from them too) and it went straight into NOOBS.
Tip #4: Get a 16GB card or larger. Windows 10 IoT itself takes up almost 8GB which means it won’t fit on a NOOBS 8GB if you want to try other OSes as well.
Tip #5: If you’re setting your own NOOBS SD card up, make sure to get the fastest SD card you can afford. Not all Class 10 micro SD cards are equal. I found a handy micro SD benchmark geared towards Raspis.
Once you pick your OS and begin installation (every installation wipes out the entire SD card), you can go get a delicious beverage because the partitioning and installation is quite slow (see Tip 5). Think about 2 hours if you’re doing both Raspbian and installing Windows 10 IoT.
When it gets to Windows’ turn, NOOBS will direct you to a Windows 10 IoT download page. You will need to login with a Microsoft account, sign up for Windows Insider, and then pick the correct installation for your device. Rather than reproduce the steps here when it’s in constant flux, you should check out Microsoft’s official guide to installing Windows 10 IoT using NOOBS.
Tip #6: Sign up for Windows Insider before you begin. I had trouble proceeding to the next step when I was doing it via NOOBS and had to restart the whole installation again. It was OK the next time as I was already a Windows Insider member.
If all goes well, NOOBS should redirect you to the OS selection page where you can pick Windows 10 IoT. This was also the part where I stumbled and required quite a few tries so do read my tips below.
Tip #7: Initial boot can take a while. However, 2 hours might just be too long to wait. The first time I managed to get to the Windows boot screen, it started at 4am (don’t ask) and it was still going at 6am. I cancelled and restarted the installation.
Tip #8: On the other hand, some patience is required. On my next installation I was not as patient and pulled the power after a few minutes. This resulted in some corrupt config and it hangs on the Windows boot logo with a cryptic error message. I was not able to fix it and had to restart the installation again. 5 to 10 minutes is a reasonable time to wait.
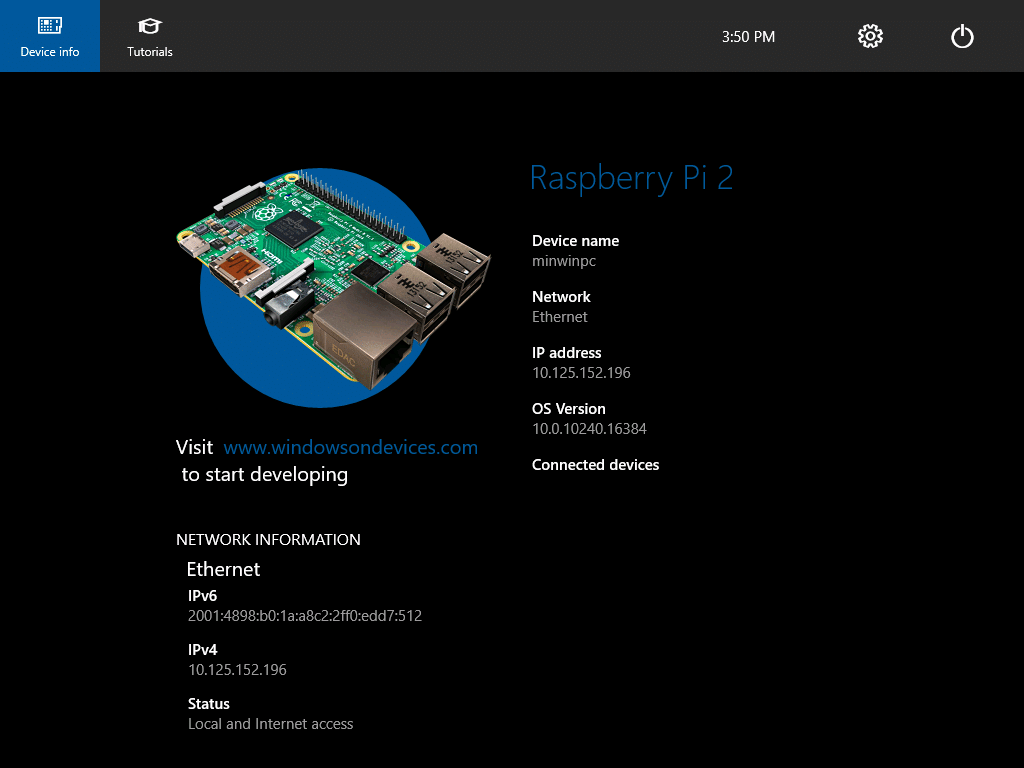
With lots of luck it should take you into the default app for Windows 10 IoT (hurrah!). You can pick some globalisation settings and connect to WiFi from this startup app, but not much else. Remember, there is no desktop on this Windows and you’ll need to load apps from another Windows 10 machine. This is a topic I will get into very soon. But first, some tips for configuring Windows 10 IoT on the RasPi 3.