Humidity Monitor - Winter of Xamarin 2017
I’m delighted to announce that I won Microsoft’s Winter of Xamarin competition this year with my Humidity Monitor App. Here’s my submission video:
The sanitised source code (with the keys and connection strings removed) is on my GitHub repo. Here’s a rough guide on how you can replicate the project and some ideas to extend it further:
Pre-requisites
- A Raspberry Pi 3 running Windows 10 IoT
- Sense HAT module
- Recommended: 40-pin GPIO ribbon cable to keep some distance between the Pi and the Sense HAT because the Pi’s hot running temperature will affect Sense HAT readings
- (Optional) A Belkin WeMo Smart Switch or alternative smart switch that can connect to IFTTT
- (Optional) A dehumidifier that can be turned on from the switch (i.e. does not require additional button presses on the device)
- (Optional) A free If This Then That (IFTTT) account
- Windows 10 PC or laptop is required to build Universal Windows Platform (UWP) apps, which is the platform Windows 10 IoT uses. A Mac OS computer can be used for all other development tasks in this project.
- Visual Studio 2017 (Windows or Mac) Community Edition and above. Make sure to choose UWP Development and Mobile Development options when installing.
- Syncfusion Essential Studio for Xamarin: Syncfusion generously offers free community licenses for individual developers and small organisations.
- An Azure subscription. I stick to free tiers where possible. The only thing I am paying for is Azure Table Storage and it costs about $0.01 a month even after my sensor has been uploading data for a month.
- Join the Visual Studio Dev Essentials program if you don’t have an existing Azure subscription because it provides free Azure credits over 12 months, along with other great benefits.
- Git clone the Humidity Monitor App source code from GitHub. Make sure it builds successfully on Visual Studio 2017 before proceeding further. This helps validate you have all the required components.
Humidity Logger (UWP)
The Humidity Logger is a simple Windows 10 Universal Windows Platform app that reads the relative humidity sensor on the Sense HAT and uploads aggregated data to Azure Table Storage. This app can only run successfully on a Pi with Sense HAT even though you could launch it in any Windows 10 device.
Azure Table Storage
We first need to create an Azure Table Storage table to load readings in. We will specify three pieces of information - the location of the sensor (e.g. “Lounge”) as the Partition Key, the UTC date time it was inserted as the Row Key, and the relative humidity reading as an integer.
The Row Key is inserted as the number of ticks before DateTime.Max. This results in a decrementing number that I call Reverse Ticks in the code. This was done because Azure Table Storage is a simple NoSQL storage solution that doesn’t have advanced querying or indexing capabilities. It automatically orders records by Partition Key and Row Key in ascending order, which means the record with the smallest Row Key (i.e. the most recently inserted record) is at the top. This makes it trivial to select the latest reading as I just need to read the first record.
Here’s the basic steps to get the Azure Table Storage up and running for the logger:
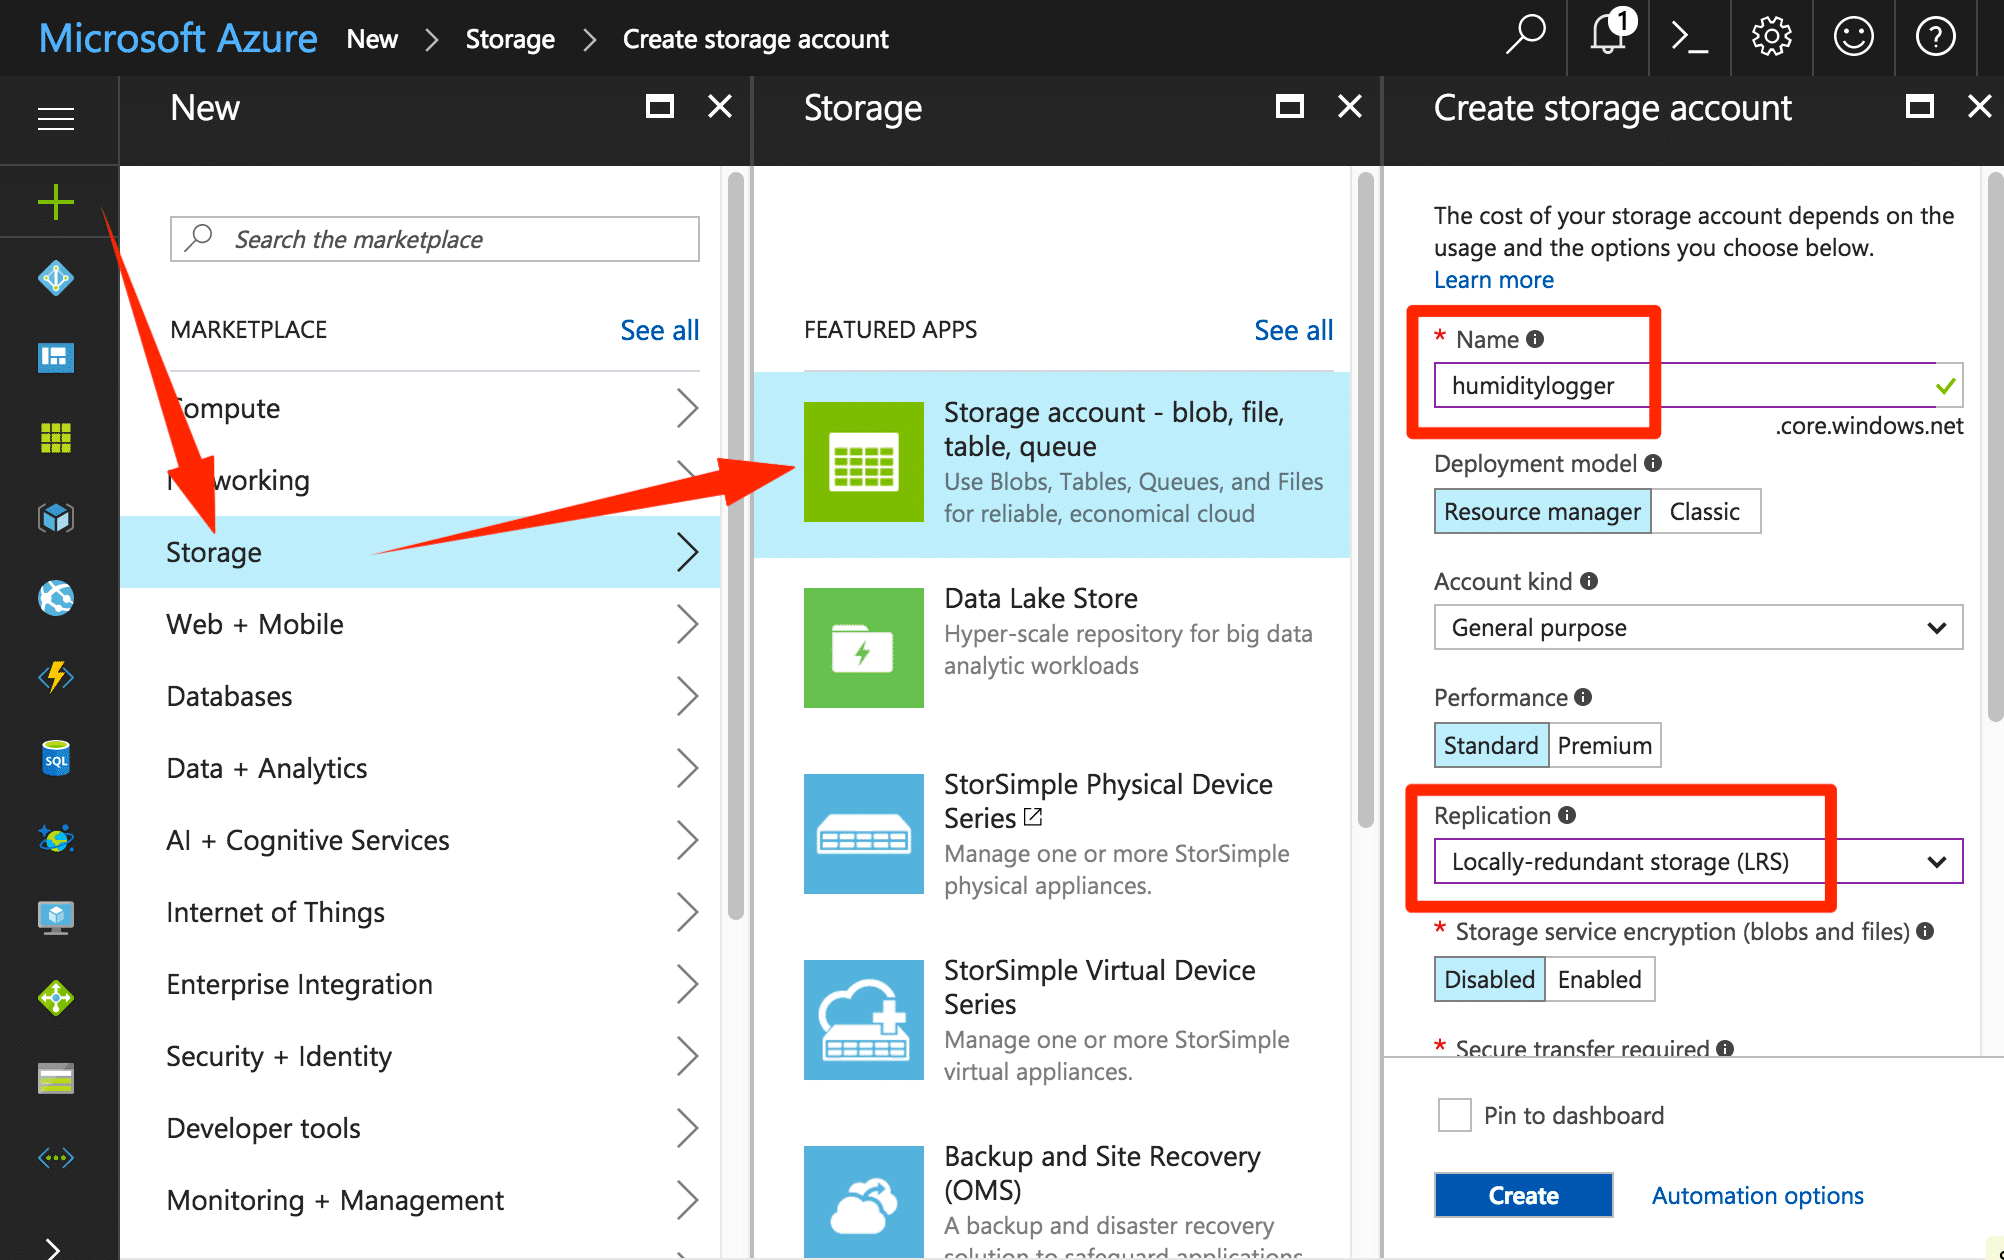
Log in to the Azure Portal and click on the Add button to go to the Marketplace. Choose Storage account and specify options. I have gone with the cheapest options where possible, including Locally-redundant storage (LRS).
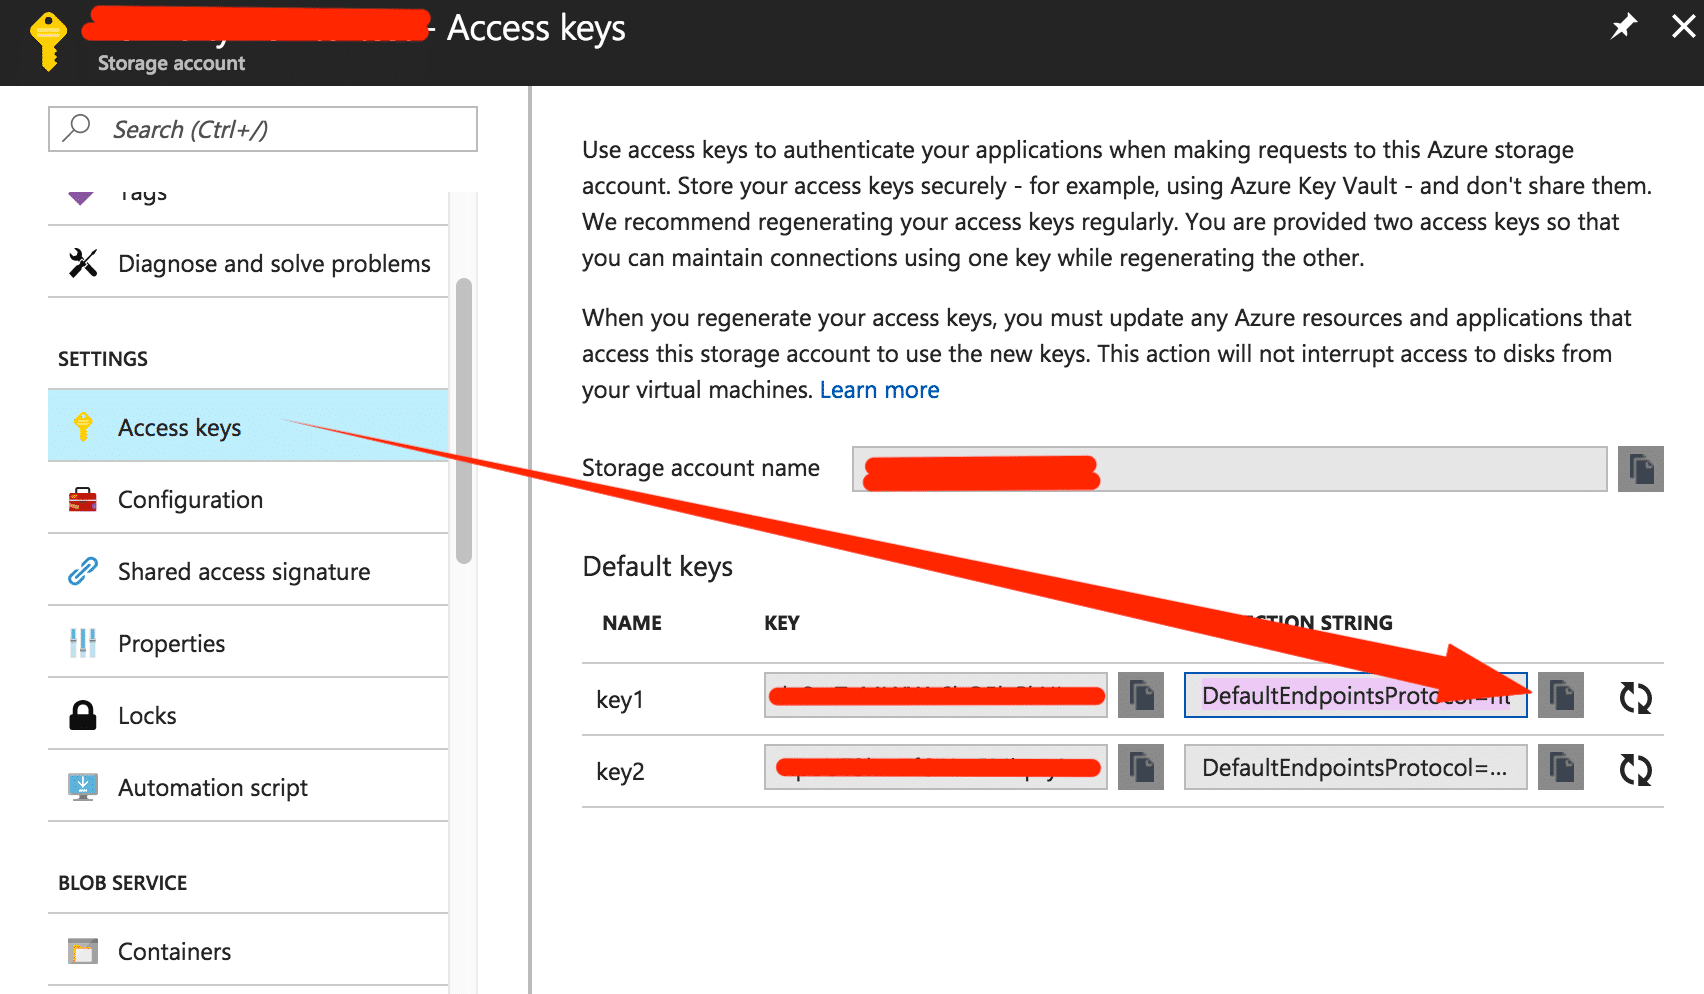
Next, go to Access keys and copy one of the connection strings. We will use this in two places in our code.
Add Connection Strings
The first place to add that Azure Table Storage connection string is in HumidityLogger\MainPage.xaml.cs in the SetUpAndLaunch() method:
actions.Add(new AverageHumidityAction(this, new TableStorageHumidityLogger("TODO - Location code",
    "TODO - Azure table storage connection string", "HumidityLog")));
Also note the need for a Location code. This is used as the Partition Key in the table storage so keep it succinct, e.g. “Lounge”.
Deploy to Raspberry Pi
I find debugging the application is the easiest way to deploy UWP apps onto the Pi. Once that’s done, go into the Pi’s Windows Device Portal and make it the default app to run on startup.
Humidity Monitor API
I’ve decided to create a .Net Core Web API from scratch, as opposed to using the Xamarin project template’s option to generate a Web API backend. I’ve kept the API very simple with only a few supported actions. The main logic revolves around converting DateTime requests to and from the ReverseTicks structure used as the Row Key. Unit tests validate the conversion logic.
Add Connection Strings
Paste the Azure Table Storage connection string from earlier into the HumidityController’s constructor:
public HumidityController()
{
    var storageAccount = CloudStorageAccount.Parse("TODO - Cloud table connection string");
    _client = storageAccount.CreateCloudTableClient();
    _tableName = "HumidityLog";
    _table = _client.GetTableReference(_tableName);
}
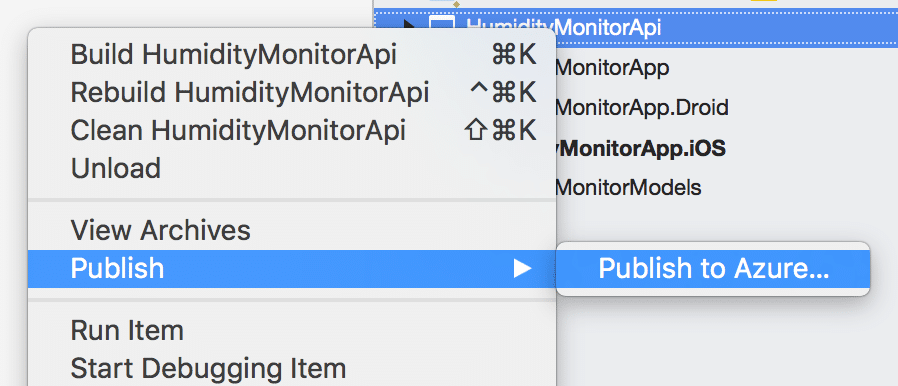
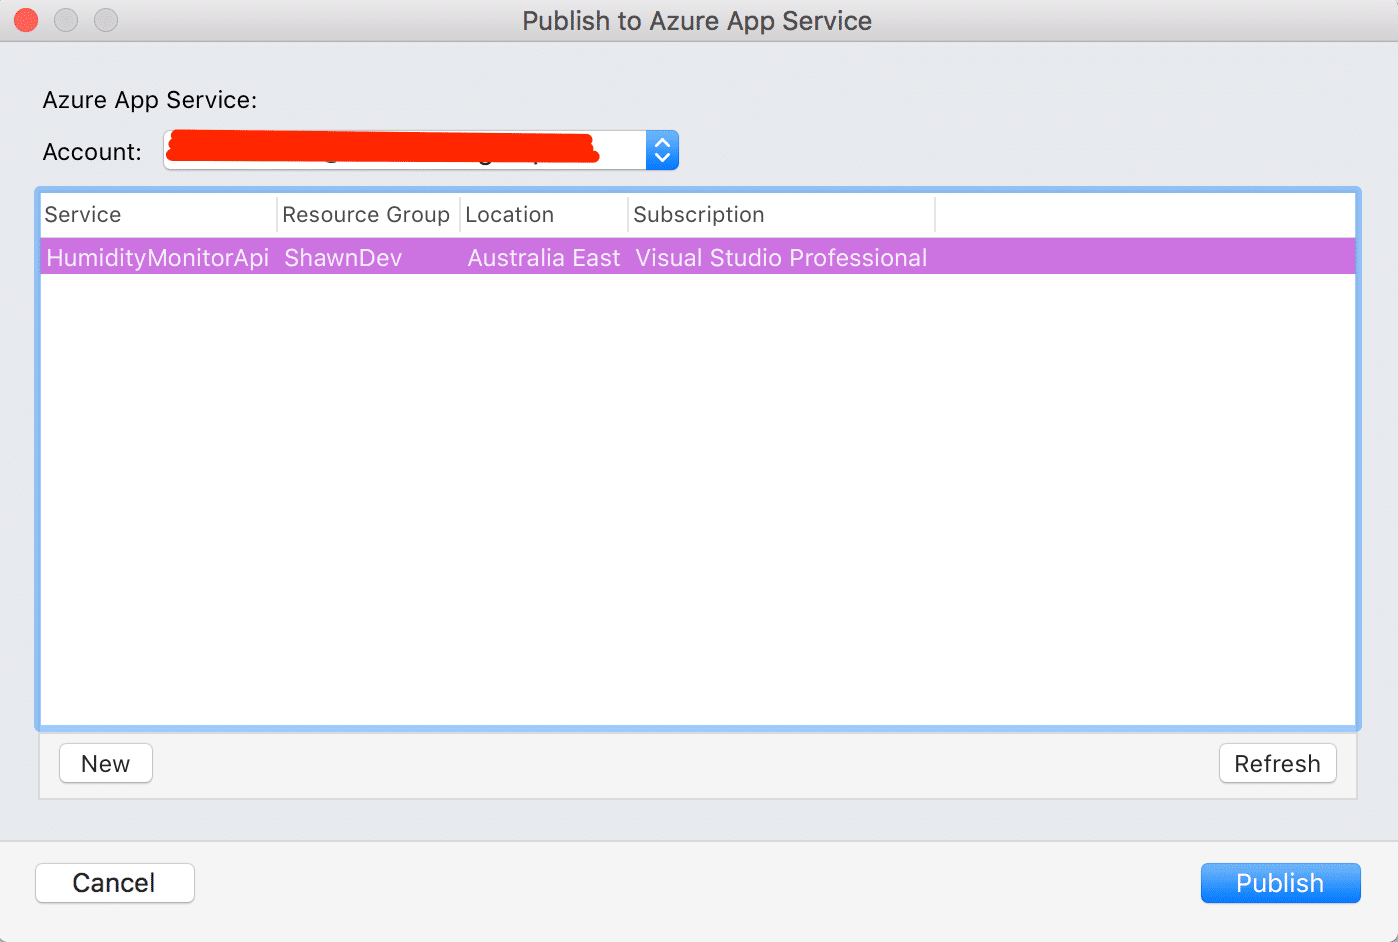
Publish to Azure App Service
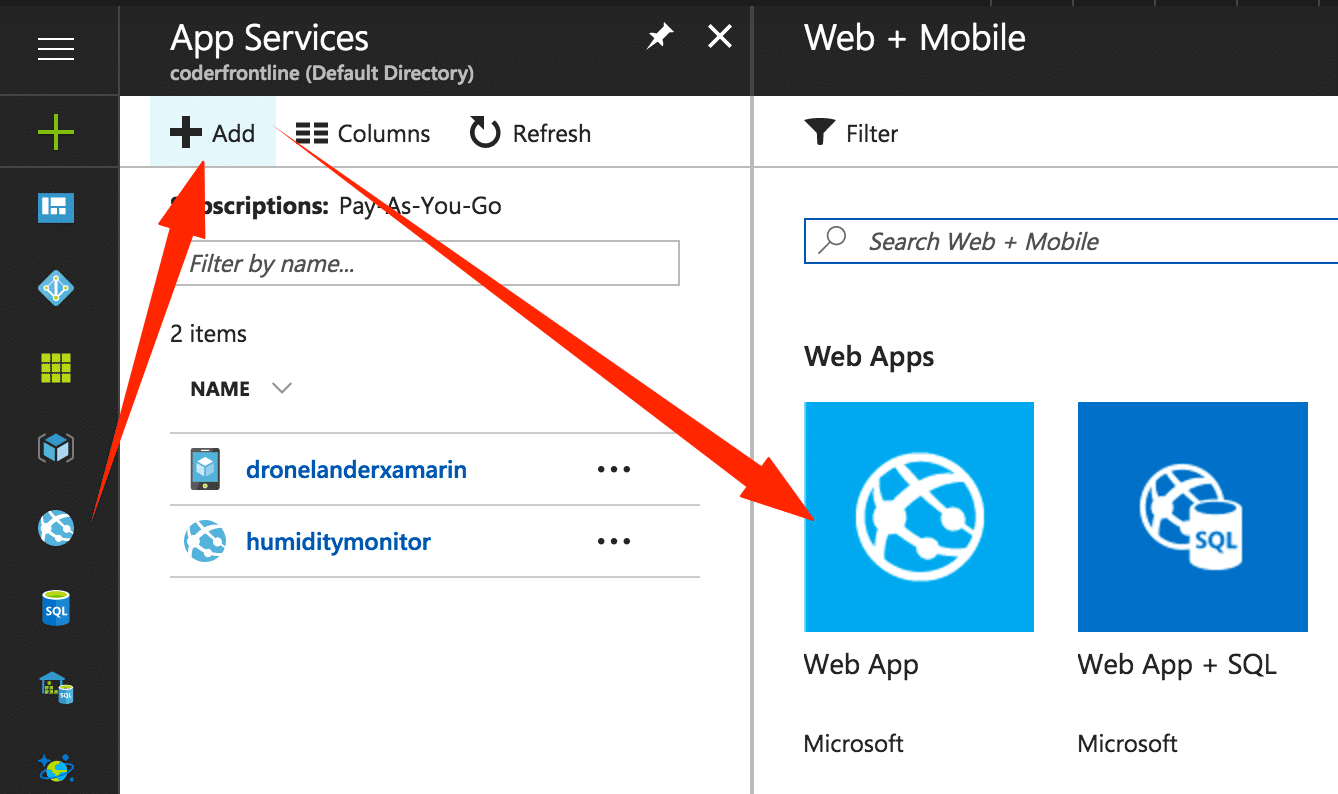
Go back to the Azure Portal and add a new App Service. Make sure to pick the Web App option, and not the Web App + SQL option.
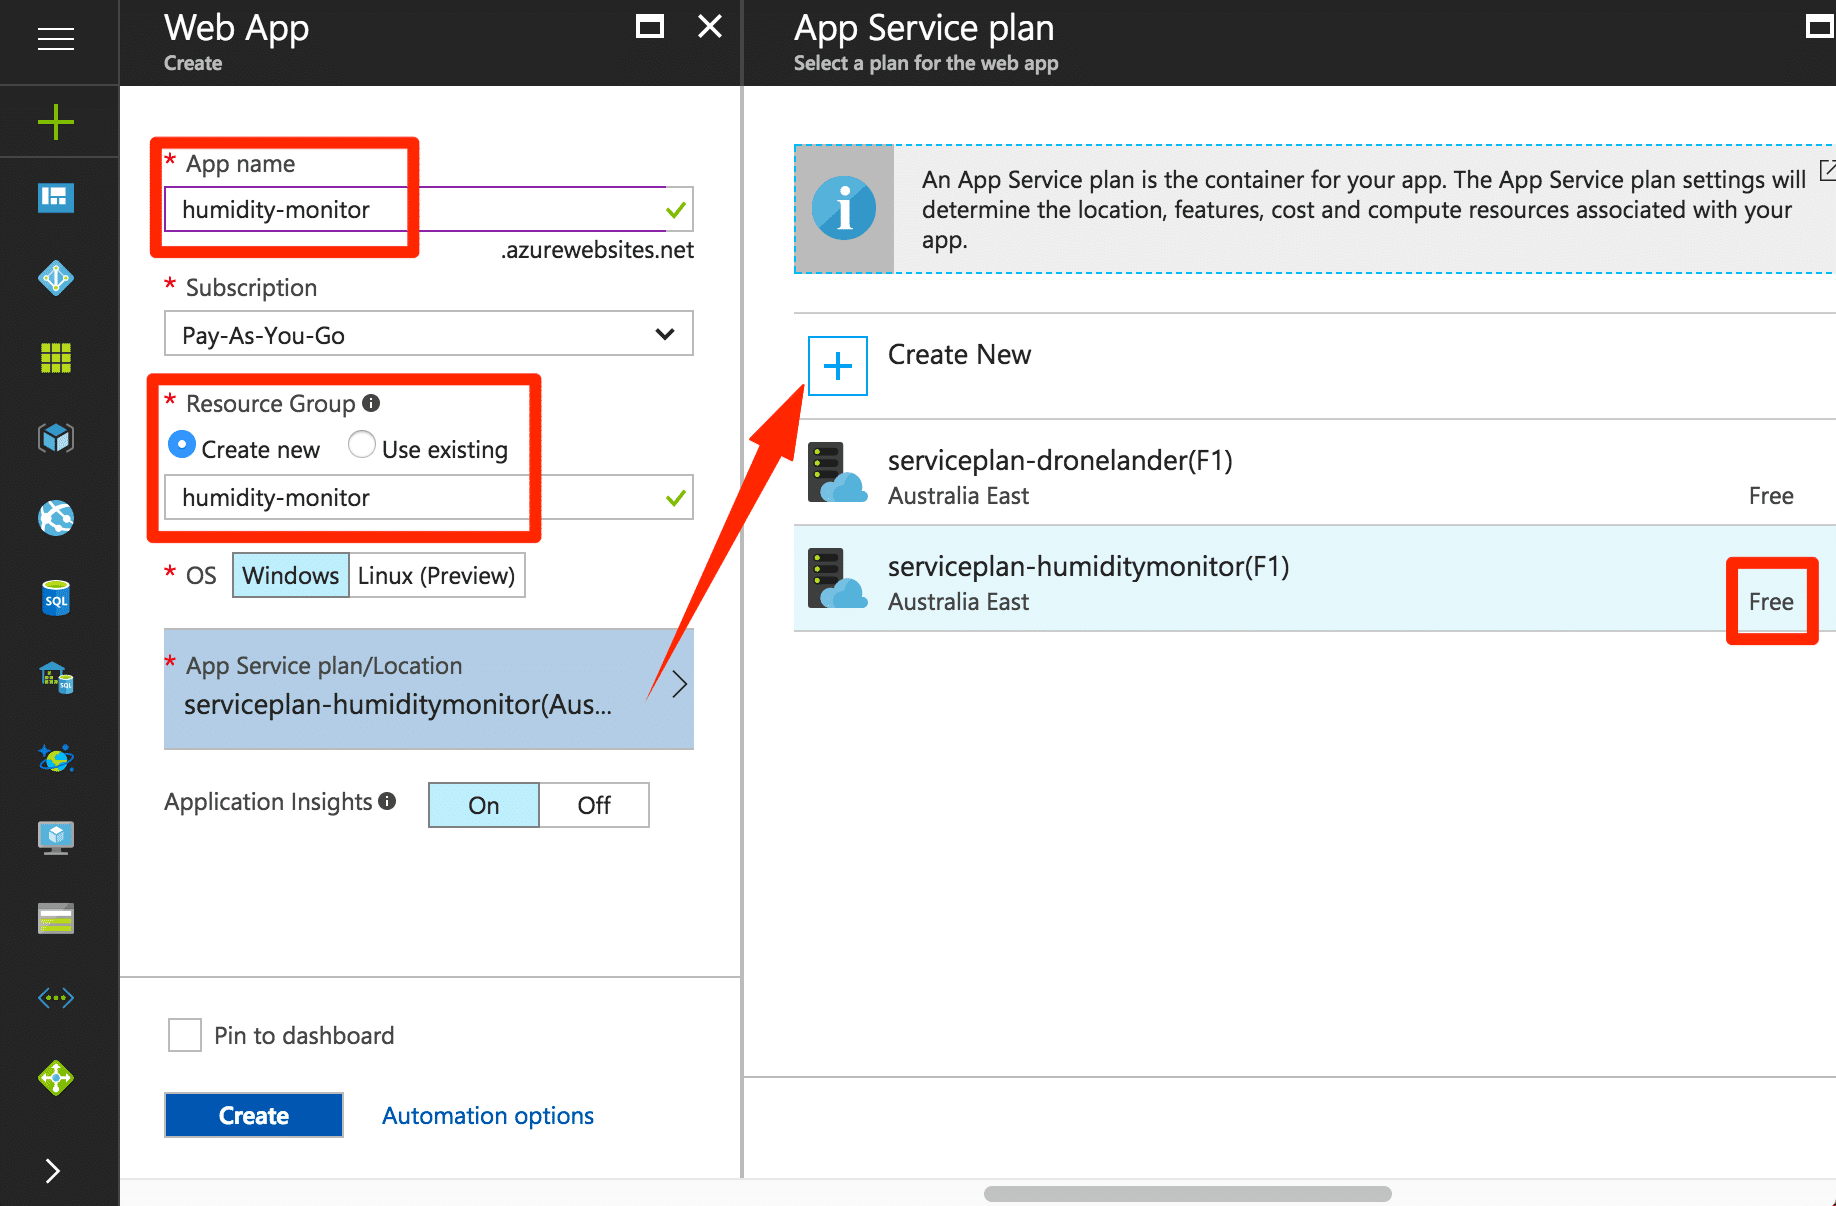
Specify the App Service options. You may need to create new resource groups and app service plans here. Make sure to create a free App Service Plan to keep costs low. Turn on Application Insights.
Note the App name forms the URL of the API, e.g. humidity-monitor.azurewebsite.net for the example below:
Head back to Visual Studio and use the Publish to Azure option. The UI looks a bit different in Windows but the general flow remains the same.
Visual Studio 2017 has a known bug where it doesn’t detect your subscription. Please try the workarounds in that link if you encounter it.
Humidity Monitor App
The mobile app is built on Xamarin.Forms cross-platform framework using MVVM pattern. I’ve tried to keep everything within the Forms project and avoid platform-specific customisations where possible. I created the project on my Mac, which doesn’t create a UWP variant. However there is no reason why it can’t run on Windows 10 devices as well.
Anyone can create self-signed Android apps for self-distribution, but iOS apps require a developer account to generate valid certificates.
Configure the App
The HumidityMonitorAppViewModel is the main view model driving the mobile app. It has a few important configurations to add in the class fields:
- _location: The location code (i.e. Partition Key)
- TIMEZONE: The IANA time zone code according to NodaTime
- _dal: Requires the base URL of the Humidity Monitor API deployed onto the App Service, e.g. http://humidity-monitor.azurewebsites.net
- (Optional) _switchDal: The IFTTT Maker Webhook key that you obtain from your IFTTT account
public class HumidityMonitorAppViewModel : ViewModelBase
{
    string _location = "TODO - Location";
    private const string TIMEZONE = "TODO - IANA time zone code";
    HumidityViewModel _latestHumidity;
    ObservableCollection<HumidityViewModel> _detailedHumidityCollection;
    ObservableCollection<HumiditySummaryViewModel> _humiditySummaryCollection;
    DateTime _detailedHumidityDate;
    DateTime _humiditySummaryStartDate;
    DateTime _humiditySummaryEndDate;
    bool _canGetLatestHumidity;
    bool _isLoading;
    bool _viewSwitch;
    ViewEnum _currentView;
    readonly HumidityMonitorDAL _dal = new HumidityMonitorDAL("TODO - Backend API base URI");
    readonly IftttDehumidifierSwitchDAL _switchDal = new IftttDehumidifierSwitchDAL("TODO - IFTTT Maker Webhook Key");
    //... more code here ...
}
Create Android Signing Certificate
Follow Xamarin’s guide to generate a self-signed Android certificate. This is mandatory for the next step.
CI/CD with Azure Mobile Center
This is an optional step but one that made my testing life easier because it automatically builds and distributes my Android app on every Git push. The Azure Mobile Center is currently in preview and is free to use. It hooks into your Azure account so make sure to sign in with your existing Azure credentials. There are many guides out there on how to configure CI/CD pipeline with the Mobile Center.
Next Steps for Improvement
Here are some suggested improvements that you can try yourself:
- The Sense HAT has more sensors. Incorporate readings from different sensors, e.g. temperature and pressure, to derive further insights.
- Improve security of the API because you wouldn’t want everyone to be able to see your humidity readings.
- Incorporate the IANA time zone code into the Table Storage so it doesn’t need to be specified on every API call.
- Make the location code configurable in the Humidity Logger UI and Xamarin app so that it can easily support different locations without changing hardcoded strings. The Xamarin app can then be extended to view records from different locations from a drop-down.
- Create configurable notifications that will alert you if the humidity breaches a threshold. This will require building a background service that polls the API at specific intervals. A fancier solution is to do the monitoring on the backend (Azure Functions, maybe?) and send a push notification to the user.
Conclusion
The Humidity Monitor App has many components but I’ve done most of the hard work. All you need is to configure some Azure resources and you’re done. I’ve also left enough gaps in the mobile app for you want to take this further. Enjoy!